Showing posts with label chevron. Show all posts

Monday, August 5, 2013

Getting My Classroom In Order: FINALLY, It's Done!

Well, today was the first official day back for teachers in my district. Our students return this Wednesday so I guess it's a good thing that I can FINALLY say that my classroom is in order and LOOKS like a real classroom again! It's taken so much longer than I had anticipated and it seemed like each time I completed a task that two more popped up. Now that all of the setting up is done, I am so excited to share the finished product with you. 

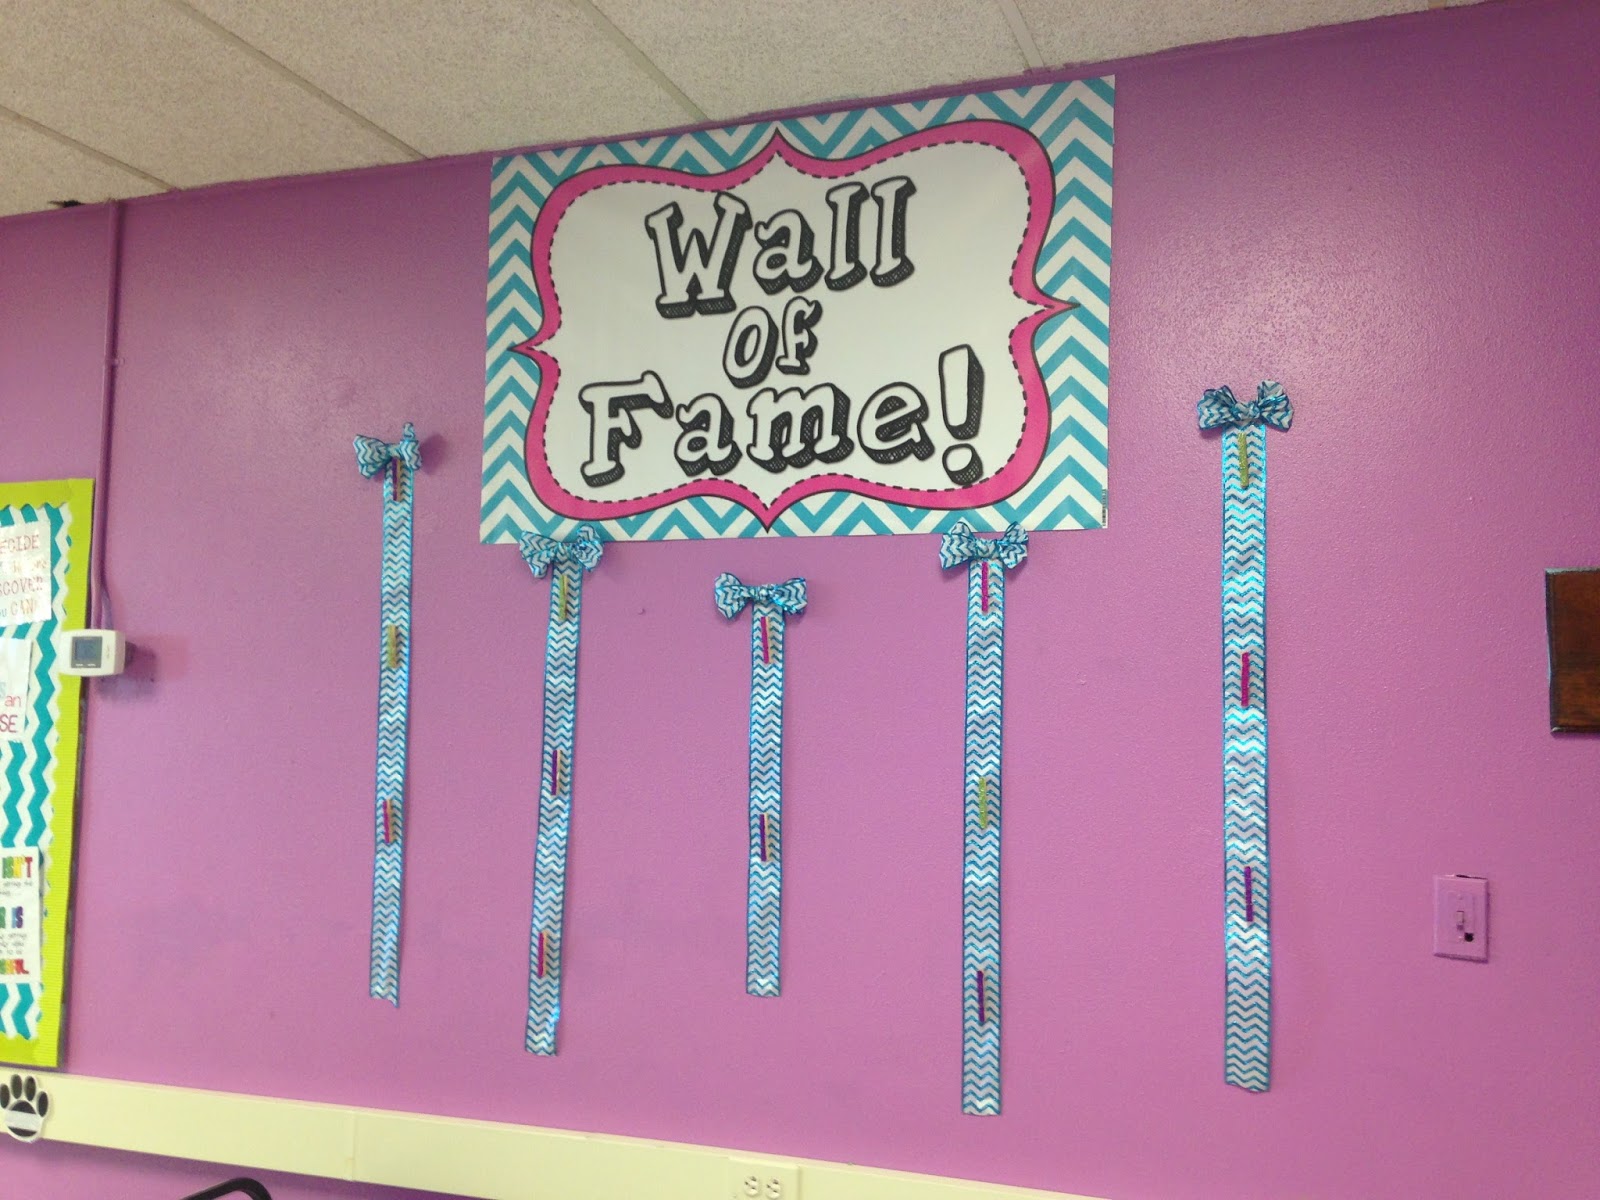
One of the biggest projects to undertake was creating my Wall of Fame in my classroom. I am so excited with how it turned out. This is one of the few times that something looks exactly like I pictured it in my mind. I designed the banner using Keynote on my Macbook and then had it made on Vistaprint. I bought chevron ribbon from Hobby Lobby and decorated the clothespins myself. There is glitter EVERYWHERE! It looks amazing and I can't wait to start displaying student work here!

I ran out of glue so I used spray adhesive instead....I am still finding glitter in my kitchen!

I cut the ribbon different lengths so that I wouldn't run out. My mom was nice enough to tie the bows for me.

I used a glue gun to attach the glitter clothespins to the ribbons.

A finished ribbon!

It turned out exactly like I pictured it. I am so EXCITED!

After completing the Wall of Fame, I started to create some extra bulletin board space in my classroom and hallway using Azure Blue paper and multi-colored chevron duct tape. It is the cheapest and easiest way to create new display space in your classroom. All I did was staple the paper to the wall and podium and then outline the paper using the duct tape. 

Trying to brighten up my hallway.

I'm going to use this bulletin board to display my hallway expectations.

This is the front of my podium.

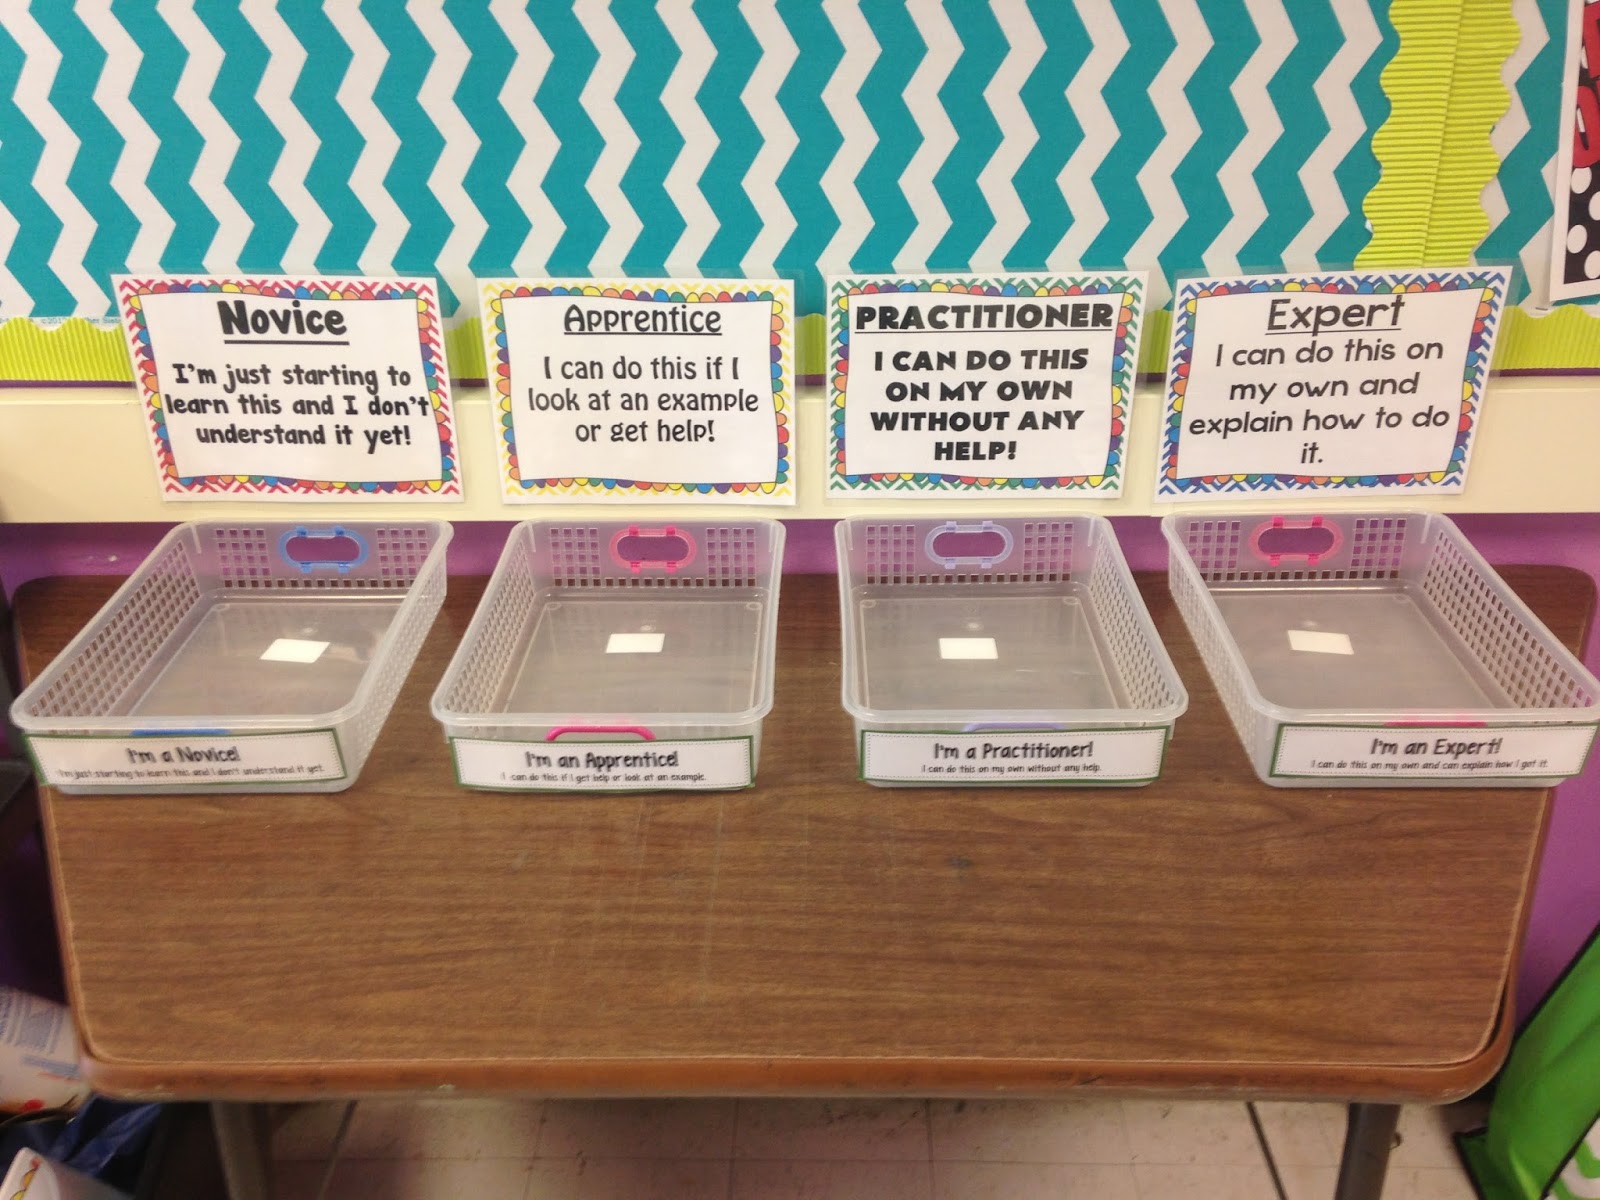
Another important area of my classroom is my self-assessment table. I do not pick up papers at the end of my class. Instead I have students self-assess their learning from that class period and turn in their work in designated baskets. I use a ranking system of Novice, Apprentice, Practitioner, and Expert in my classroom. It is probably one of my favorite things that I instituted in my classroom last year. I worked over the summer to revamp my system and decided to upload the finished product to my store. Click here to check out this amazing self-assessment system for your students! 


After finishing the self-assessment table, it was time to set up and decorate the back walls of my classroom. I call this space my Wall of Wisdom. Usually the Wall of Wisdom only contains posters that I have bought from our local school store, but this year thanks to Vistaprint I was able to create one of my own. 

A few of my favorite pieces of advice to share with my students.

This is the banner that I designed. I also got this design in business card size so that I can staple it inside each of my student's agenda.

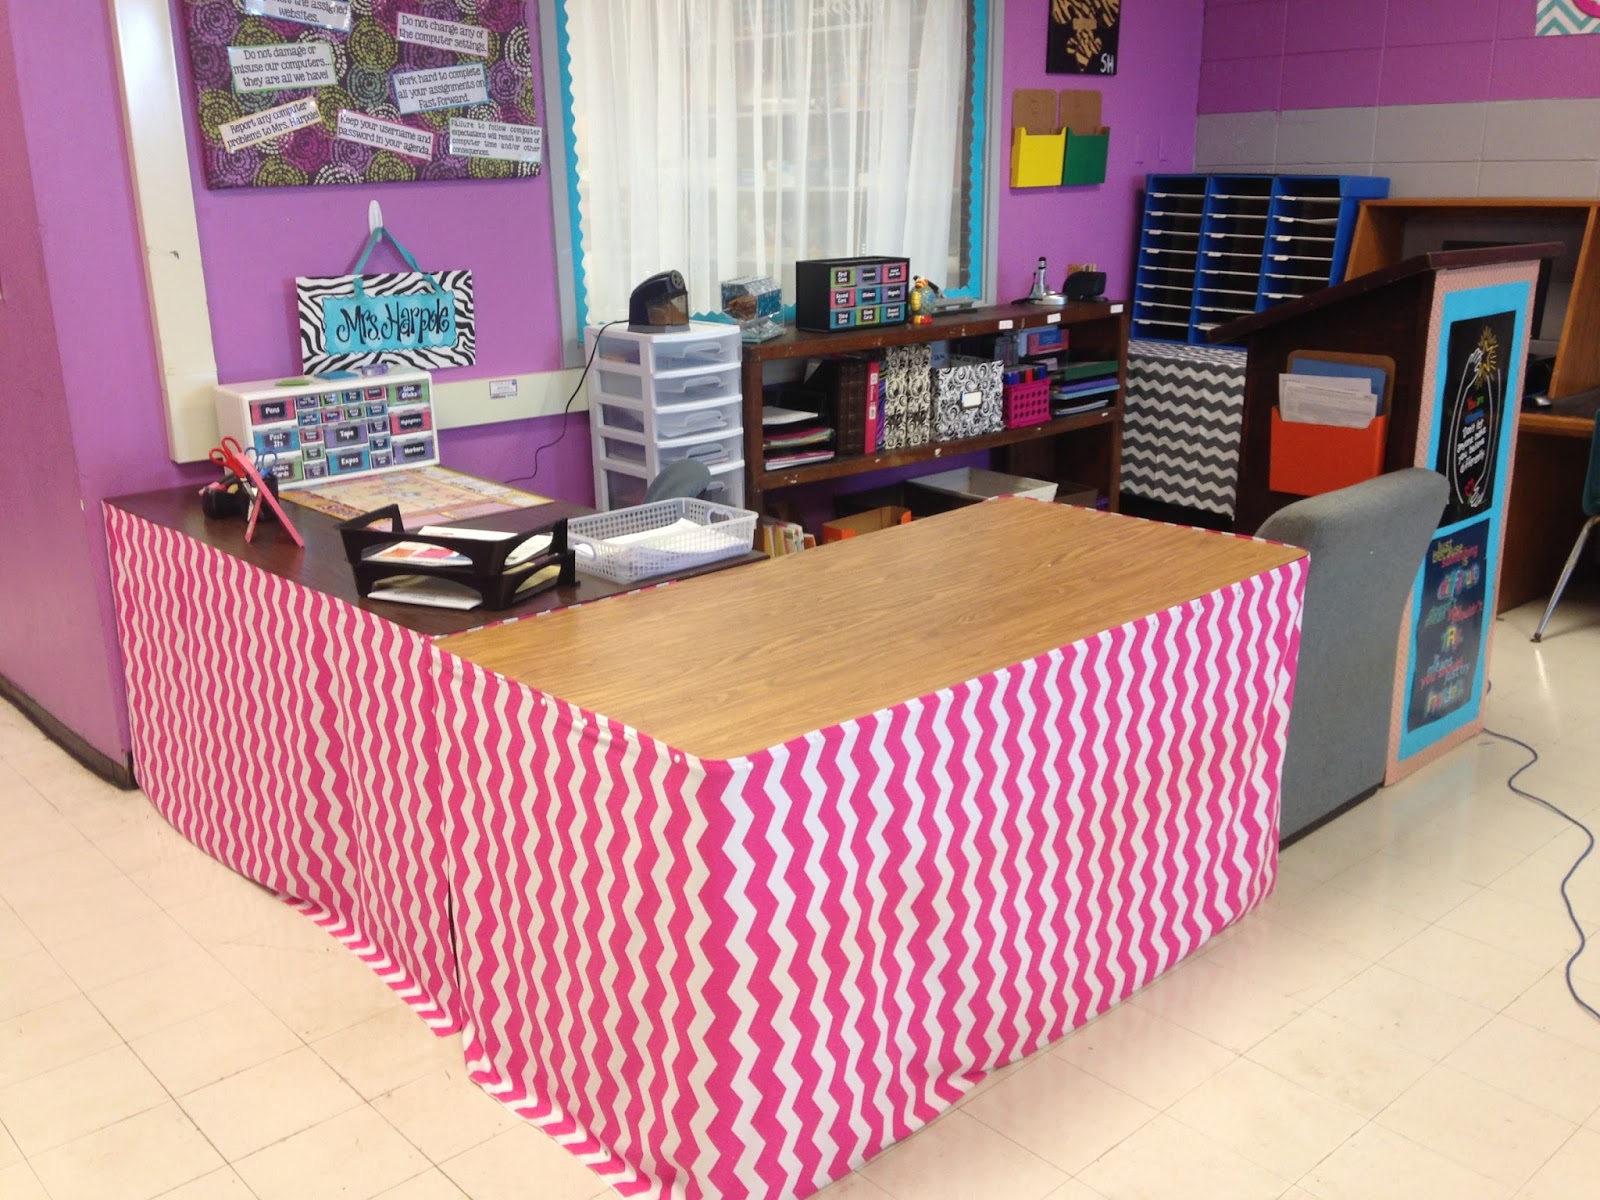
Next was getting my teacher space organized. Trying to organize my things and space was a very long and tiring process. It's crazy to think of the things that you accumulate in just a year. I used pink chevron fabric from Hobby Lobby to create a table skirt that went around my desk and side table. I love it! After getting this attached to my desk and table, it was on to getting rid of the clutter and going into super organized mode.

Before the de-cluttering process :(

After the de-cluttering process :)

I don't know what I would do without my teacher toolbox and calendar from School Aids!

This just might be the most organized this bookshelf has ever been...I'm hoping it stays this way.

I also repurposed an old teacher toolbox and updated it to match the theme of my big toolbox. This toolbox will contain classroom management rewards like my student punch cards, stickers, student shout outs and more.If you want punch cards for your students, click here to check them out!

Here's a sample of my positive behavior punch cards!

This thing needs a little excitement added!

Much, much BETTER!

The final beast I had to tackle in my classroom was my office. It sometimes reminds me of Ariel's cave from The Little Mermaid because there is no telling what you will find in there...especially as the year progresses. Seriously, it was so bad that I didn't even take a before picture! At least you get to see the finished, amazingly organized office! :)

I moved my filing cabinet into my office because it was just taking up space in my classroom.

You can actually see the top of the desk :)

If you look real hard, you can see that my shelves slightly resemble a shelf in Walmart...I may have gone a little overboard :)
Here are just a few more peeks to see from around my classroom.

I created this memo board to display computer expectations in my classroom.

This is a perfect example of my OCD. My construction paper is sorted and labeled by color.

A poster that I created on Vistaprint that I will be using on the first day of school

Seriously the best way to display learning targets. It makes so much sense for the kids. Thanks Pinterest! :)

Another way to promote positivity in my classroom by allowing the students to give each other shout outs. You can buy this product in my store if you click here!

I won these books as part of a grant from First Book. I have enough copies to give each of my students!

Last, but not least I have to show you the awesome Common Core planning product that I bought from Study All Knight. She has this flip chart available for all ELA grade levels. You should go check it out!


I hope y'all like the finished product as much as I do. Like I said earlier, it was a very long process and I wanted to give up so many times, but I am so glad that I pushed through. Now the real test begins. I'm really hoping that once school begins in two days that I can continue blogging regularly and sharing what happens in my classroom. 


Tuesday, July 23, 2013

Getting My Classroom In Order: Part 2


All I can say is that today was a LONG day in my classroom and I am worn out! Day 2 proved to be extremely productive. My room is starting to look like a classroom again and I can kind of see the light at the end of the tunnel, but there is still much work left to be done. The good news is that I think once Thursday is over, it will be complete and I can relax for all of a week and half before school starts. Speaking of that, I'm not quite sure where the summer went because it does not seem like two months have passed already. 

 One of the things that I dread most when it comes time to decorate my classroom is my windows. Sure I could just lower the blinds and not give them a second thought, but the perfectionist in me just won't let that happen. I used wrapping paper last year that made things so much easier than bulletin board paper, but I couldn't find any chevron wrapping paper. I decided to use azure blue paper because I thought it works really well with the purple walls.

So many windows to cover.
I measured the windows and cut the paper before taping it to the window pane...did I mention I can't cut a straight line?

Thirty minutes later...why must this be so time consuming?

Paper is done...now onto the border!
I alternated between a lime green and purple border. I really like the finished product!

After finishing the windows, it was time to get the desks arranged and things put back in their place. I must have changed the desk arrangements ten times and I am still not satisfied with them. It doesn't match the grand scheme I had in my head, but I'm just going to have to deal with it. I'll add pictures of that once I am sure though.

One of my amazing friends gave me her chevron contact paper that she had left over from her classroom and I had so many ideas of how I could use it. The first thing I did was redo my front table that had seen better days. I use this table to house my projector and elmo along with random papers and other things. I used the blue chevron contact paper to make it a bit more stylish, but can I tell you it was not as easy as it looks. The paper gets bubbles in it and no matter how much smoothing you do they don't go away completely; however, I still love it!
It's not perfect by any means, but it looks ten times better than before!
I wonder how long this table will stay clean and clutter-free?

After completing the front table, I went to work on my bookcase that I got from another friend at my school. A previous teacher had taken pages from a book and decorated the bookcase with modge podge. It looks unique and fitting in my classroom, but the modge podge was making books stick to the shelves. I decided to use a gray chevron pattern to keep my books from being damaged. If I thought the table was hard, the bookcase was even worse. Thankfully it will always have books on it to hide the imperfections.
It has taken me YEARS to build up my classroom library, but I am very happy with the selections I have now!

After getting the bookcase done and all the books on there, I got to work on updating my Fiction Road Map. I saw this idea on Pinterest last year over Christmas break and knew I wanted it in my classroom, but I knew I couldn't make the beautiful hand painted wooden signs so I created my own. I included some of my favorite fictional places and I really love the updated product. You can get the signs for FREE in my store.

Can you spot the one that's not like the others?

I am in LOVE with this project!

I think The Capitol might be my favorite sign I created!

Thanks to my mom who is ALWAYS there to help out, we were able to divide and conquer the rest of the afternoon. She worked on putting tape on my board so that I could create some more awesome spaces while I worked on my teacher toolbox. I created my teacher toolbox last year and pretty much just did the first thing I thought of. It was cute but not exactly what I wanted. I told myself the entire summer that I was going to redo it, but there was just no motivation until I saw a product from Live Love Math. She created these AMAZING labels that were editable and they were bright and chevron. Exactly what I wanted and needed! I made my labels, printed them out, and laminated them for durability. It took me all of ten minutes to complete.

My old teacher toolbox. The paper was getting funky and it was hard to read the words on each bin.

My new AMAZING teacher toolbox!

The last thing I worked on today was getting my white board decorated. I decided to use a gray chevron border on my board because the other border I got was paper and I know it would get dirty and funky in a short amount of time. On the right side of my smart board, I always use it as another bulletin board. I wanted to use chevron fabric there too, but I wasn't sure how to attach it so I just used the blue paper I bought. I decided to use the purple border to really make the blue background pop. 

I'm still trying to figure out what else to do on this side.

I really LOVE this color combination!

It's a little blurry, but you get the picture :)

As you can see, I made TONS of progress today in my classroom, but there is still a lot to be done. Keep an eye out in the next few days for Getting My Classroom In Order: Part 3! Cross your fingers and wish me luck that this will only be a trilogy!


Thursday, July 18, 2013

Getting My Classroom In Order: Part 1

Each year once May comes around and things start winding down, the same thought crosses my mind. I am not going to completely re-do my classroom over the summer. This year I uttered the same phrase over and over again to myself and others; however, like every year before something has caught my eyes and I start to think that I just have to have that in my classroom.

I've never had a true theme in my classroom just bits and pieces of my favorite things-bright colors, zebra strips, polka dots, etc. It worked and I loved it; however, after five years it has gotten a bit stale and not quite as exciting as it used to be. Thanks to Pinterest and other websites, my current obsession is everything bright chevron! 

I went last week in search of everything chevron I could find and everything I need to get ready to start a new school year. I made my list and double checked it because I do not want to be waiting in long lines at the last minute like I usually am because I forget some things that I need. I'm not sure about where you live, but in Baton Rouge the only place that had chevron fabric was Hobby Lobby. I was shocked that they still had exactly what I needed in stock.

LOVE LOVE LOVE!

I then stocked up on school supplies like border, letters, and my desk calendar from School Aids. 

I love the fact that I can get this calendar for only $4 and it comes with coupons!
I may have gone a little overboard...


Now that I had done the shopping, it was time to get into my classroom and become completely overwhelmed. It's at this point that I normally start questioning why I decided to change things again and create more work for me when I should be at home enjoying summer. 

The entry way to my classroom. My office is through the door on the left.

Now that's a shiny floor and LOTS to put back in order.


I knew the first thing I wanted to do was get rid of my desks and add tables to my classroom because my students will all be getting brand new laptops through our district's One to One program and I don't want a crowded desk and broken computers to be an issue. Before I can do this, however, I needed to figure out the layout of the classroom. I decided to move my teacher area to the other side of the room closer to my office to allow more space near the Smartboard in my classroom.


I then started working on other things while I wait to switch out my desks for tables. I wanted to get the most time consuming things out of the way first. My bulletin boards are always the most time consuming so I got to work. 

I love the way the blue chevron stands out on the purple walls!

I used a lime green border with the blue chevron. I also split the bulletin board into two since this is the only once that I have in my classroom.

I love this, but I need to figure out what to put in the blank space at the top. Any suggestions?

I used bright blue border on the window into my office and put up white sheet curtains so that I can still see out of the window. I am going to be using this as my vision board and a way to display my Student Out Winners.
Another of the big projects I am working on is my Wall of Fame, where I display student work. I designed a chevron banner and got it printed at Vistaprint using one of my many Groupon deals. Under the banner, I am making wall hangers using glittery chevron ribbon and glitter clothes pins. 

This will be on the right wall so that it is visible as soon as you walk into my classroom!
This was all I had time to do on Day 1, which I also spent cleaning out clutter, organizing my desk, and doing a few other odds and ends. Look for another edition of Getting My Classroom In Order sometime next week.  Here are just a few more pictures of the progress to leave you with!

I love this sign too much to get rid of it!

I wonder how long it actually stays this organized...check out my post cards and stamps from Vistaprint!